Need help? We're here!
(888) 312-8812 Login SignupBrake Pad Replacement: A Step-By-Step Guide
September 06, 2021

The brake pads are among the most crucial components of your truck’s braking system. They contact and apply pressure and friction to the truck’s brake rotors—those shiny, metal discs shaped like a flying saucer mounted on the wheel hubs—to slow down and stop the wheels. Once the wheels stop rotating, the vehicle stops moving as well.
Brake pads undergo extreme stress and wear whenever you apply the brakes to slow down your vehicle or put it to a stop. So before you hit the road, you must check if they are still in good working condition. While brake pads typically last around 50,000 miles of travel, this can be shortened to 25,000 miles, depending on your driving habits, the pads’ materials, and the condition of the road you drive in. Knowing how to troubleshoot common brake issues in heavy-duty trucks can help you understand why brake pads wear differently from one truck to another.
How do you know if it’s time to replace the brake pads? Well, here are the telltale signs of worn-out brake pads:
- They are already below the proper thickness.
- The low brake pad indicator lamp turns on.
- You hear a squealing or grinding noise when you step on the brakes.
- The steering wheel shakes or vibrates when braking.
When you notice any of these signs, let a mechanic inspect your brake system and have the pads replaced if necessary. But if you are mechanically minded and confident to do the task yourself, feel free to do so. Brake pad replacement is relatively quick and easy to accomplish without the need for specialized tools. For broader brake upkeep, many truck owners also explore semi-truck brake system maintenance to stay ahead of potential issues. Read on below for the step-by-step instructions:
Tools and materials required:
- New brake pads or disc brake pad set
- Jack and jack stands
- Torque wrench
- Pliers
- Spanner
- C-clamp
- Wire brush
- Torque socket
- Pneumatic wrench
- Point sockets (2)
- Pin punch
- Brake cleaning spray
- Disc brake lubricant
- Wheel chocks
- Safety glasses and mask
- Personal Protective Equipment and gloves
Note: While most brake pads are sold in sets of fours, you don’t necessarily need to replace all four pads at once. But be sure to consider that your brakes and rotors usually come in pairs, so you might as well choose to replace your brake pads in pairs at the same time.
Removal
- Ensure to wear personal protective equipment and gloves to protect your clothes and hands from the chemicals and dirt you'll encounter during the procedure.
- Put on your safety glasses to protect your eyes, and wear a mask to prevent inhaling dust and dirt.
- Park your truck on a flat surface and chock the wheels to prevent it from rolling. See to it that the engine is shut off and the service brake and the parking brake are not applied.
- Safely raise and support the truck using a jack and jack stand.
- Remove the wheel using an impact wrench. Then, remove all worn accessories, such as the spring clip, washer, pin, and metal retainer.
- Using a shear adapter, screw out the tappet and the rewind adjuster.
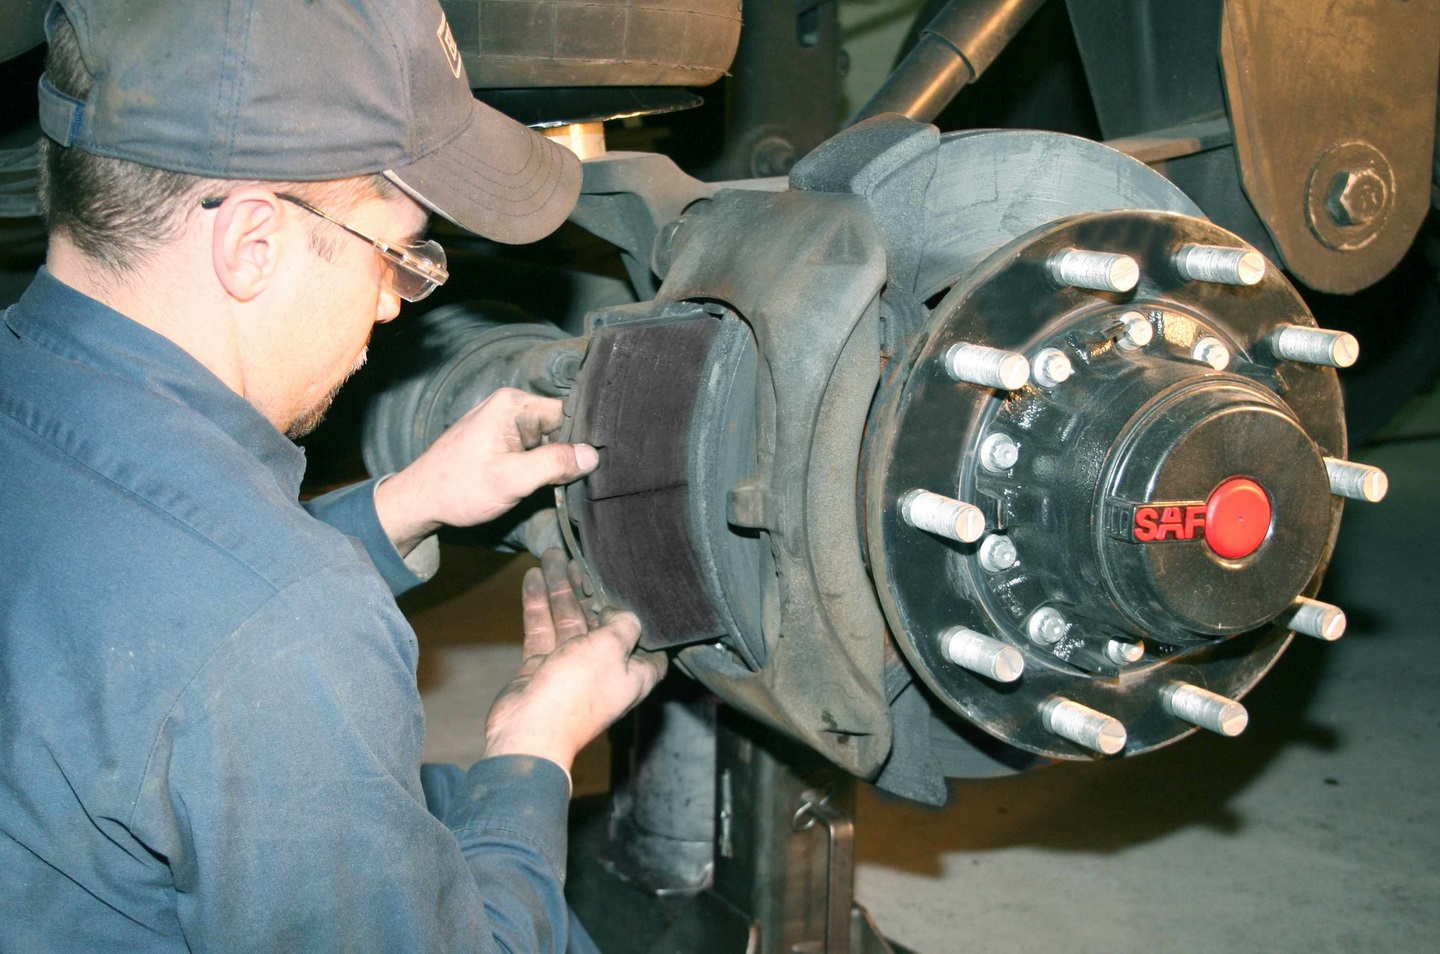
- Pull out the outer brake pad and the inboard brake pad.
- Check the caliper clearance—if you can’t move the caliper, then check the caliper guide seals.
- Try examining the disc as well. If it is below 37 mm thickness, it must also be replaced. But if not, then clean the disc and remove any light corrosion to prevent further buildup.
- Clean the brake pad bay using a wire brush. This helps remove any dust accumulation. Complete the cleaning with a brake cleaning spray.
- Check the boot assemblies and the tappet for any signs of wear. Replace them if necessary. Fully wind back the tappet and boot assemblies in a counterclockwise motion.
Installation
- Get the new brake pads and compare them to the pads that you just removed. Make sure they have the same design.
- Use a C-clamp to push the caliper piston back in its bore. This is done to ensure the new pads will fit.
- Lubricate the backside of the brake pads, specifically the points where they touch the caliper.
- Slide the caliper inward and insert the inner brake pad. Then, slide the caliper outward to insert the outer pad.
- Using a shear adapter, wind out the rewind adjuster until the brake pads come into contact with the disc.
- Turn back the rewind adjuster three times until there’s enough running clearance.
- Put the metal pad retainer, pin, washer, and spring clip back into place. Use new accessories if necessary.
- Turn the adjustment shaft clockwise until the newly installed brake pads touch the disc.
- Set the correct running clearance by turning the adjuster counterclockwise. This ensures the disc can turn freely. Then, put a new adjuster cap in position.
- Refit the wheel and tighten the lug nuts in the correct order using an impact wrench.
- Use a torque wrench for final tightening. Make sure to do this according to the torque instructions provided by the vehicle manufacturer. Also, follow the tightening order, nut after nut.
If you ever need to work on other braking components, such as chambers, knowing the steps to replacing the air brake chamber can make related maintenance jobs easier to approach with confidence.
Important Tips
Before you purchase new brake pads or a disc brake pad set, be sure to consult your truck’s manual to ensure you get the correct pads for your vehicle. Take note of your truck’s year, make, model, and engine type, and have the information readily available when you start checking for brake pads options online. Once you’ve got the new brake pads, decide whether you’d do the task yourself or leave it to a professional mechanic.
If you haven’t got a new set of brake pads yet, then FinditParts can help you. We have a huge selection of brakes and wheel-end parts, including brake drums, brake shoes, brake discs, brake rotors, and of course, brake pads. All these brake components are available at competitive prices, so you can enjoy savings on your online purchase. For broader parts upkeep, many fleet owners keep track of the top three most commonly replaced truck parts to plan maintenance and avoid downtime.
We, here at FinditParts, want to make your online shopping experience as convenient as possible. So, if you have a specific brand in mind, you can simply enter the brand name in the search tab and specific search results will be provided to you. The same is true if you know the exact part number of the product that you need. All thanks to our quick lookup by part feature, finding the replacement brake pads for your truck is as easy as 1-2-3. Check out our online catalog today to find some of the best brake parts brands in the industry, including Hendrickson, EBC Brakes, Bendix, Raybestos, and Federal-Mogul Wagner.
To help keep your truck safer on the road over the long term, understanding why brake system maintenance prevents major road accidents can reinforce the importance of timely inspections and replacements.


